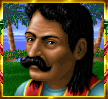
Heroes I: battlefield tactics, spell supplies and sieges
Nine situations and twenty-seven steps with original portraits and spell icons. Examine retaliation, contact-blocked shooting, Skip, Knowledge supplies, Blind versus Paralyze, speed categories, Teleport, damage ranges and a wall breach.
A1–E5 are local editorial diagram coordinates, not the full game battlefield indices. Stack numbers are identifiers rather than creature counts. Steps can compare alternatives or conditional later states, and grant no free actions. These are teaching diagrams rather than a complete battle simulator.
First hit, survival and one ordinary retaliation
Retaliation follows the hit. First check whether the target survived and may respond, then plan another attack in the same round.
Pikeman attacks adjacent Swordsman. Counts are unspecified: the first hit may destroy the target or reduce the number able to respond. The next frame assumes a surviving defender.
Eligible Swordsman retaliates. This is a response to the hit rather than another voluntary action. The diagram assumes no other effect prevents retaliation.
If Goblin gets an opportunity in the same round, it can attack the target after its ordinary retaliation has been spent. Other actions may intervene; this is not a free uninterrupted attack sequence.
Check in the actual battle
The manual gives an ordinary stack one retaliation per round. Griffin retaliates without that limit; Sprite, Rogue and Hydra prevent enemy retaliation. These exceptions change the plan. Further actions depend on Speed and alternating sides.
Goblin is adjacent to Archer. Distant Swordsman is tempting, but contact prevents shooting. The red line marks an invalid plan rather than a shot actually fired.
This later state assumes Goblin was actually removed and Archer has a new action and ammunition. Only now is a valid shot shown. The previous frame did not guarantee a kill.
Check in the actual battle
Base Archer has 12 shots; Elf has 24 and double shooting, while Druid and Orc have 8 each. Ammunition does not override contact blocking. Distinguish the melee halving from final damage after Attack and Defense adjustments.
Under these assumptions attacking Druid (Fast) starts, followed by defending Rogue (Fast), then Pikeman and Swordsman (Medium), and finally Archer (Slow). Compare categories rather than Heroes V Initiative.
Druid stays in place and passes its current action. No later waiting turn is created. Rogue is next in this example; the opponent is neither skipped nor frozen.
Ordinarily Druid acts again in a later round. The diagram does not simulate the other four stacks’ attacks or promise unchanged positions after their actual actions. Good or bad morale can alter the sequence.
Check in the actual battle
The example assumes the friendly side attacks, with no speed changes, morale events or additional stacks. The sequence explains these assumptions rather than every tie and missing-category case. Skip grants neither a defense bonus nor another action later in the round.
Knowledge is not a mana pool. This illustrative hero has Knowledge 2, two prepared Lightning Bolt casts and two Blind casts; casting spends the selected spell’s supply.
Assume two actual prepared copies of each listed spell. The hero has not yet used its action this round, and a friendly troop is acting. Knowledge does not mean 20 mana here.
Casting spent one Lightning Bolt copy and the hero’s action for this round. At the assumed Spell Power 3 the base hit is 25 × 3 = 75 HP before target restrictions. Having Blind available does not permit another immediate cast in the same round.
Only in a later round, during a friendly troop turn, does the hero spend a new action on Blind. The target must have survived and remain eligible. One copy of each now remains; intervening troop actions are unspecified.
Check in the actual battle
The supplies are separate: casting Lightning Bolt does not consume Blind. The hero is also limited to one action per combat round and casts during a friendly troop turn. This example’s Knowledge and Spell Power are not claims about Astra’s starting attributes. Check spell learning and replenishment in the spell book before battle.
Both spells restrict active actions and end on damage. The manual nevertheless allows retaliation under Blind and explicitly prevents it under Paralyze.
Pikeman hits blinded Swordsman. The manual permits a blinded stack to retaliate, so the opening hit is not guaranteed safe. The response arrow assumes the defender survives and is otherwise eligible.
2. Paralyze alternative: the opening retaliation is prevented
In the same position, compare a target under Paralyze. The hit ends paralysis, but its rule prevents retaliation against this opening attack. No further free hit against the awakened opponent is granted.
After the previous hit, surviving Swordsman is no longer paralyzed. Its future actions depend on the actual queue and battle state. Without another valid effect it can no longer be treated as disabled.
Check in the actual battle
The first two frames compare alternative effects, not two casts by one hero in a round. Heroes III school-based 50/25/0% values and the Heroes II reference engine’s half retaliation are not applied. Reassess the target’s state before any later hit.
Haste and Slow change categories and opportunities
Heroes I Speed uses named categories. Haste and Slow are shown against the original manual, without converting them into later games’ bonuses or timelines.
Ogre has base Speed Slow and Druid Fast. The difference affects attacking and movement opportunities; the depicted distance establishes neither reach nor a battle winner.
One alternative hastens Ogre. The manual labels the resulting category Fast. The full spell card also records a conflicting community value; neither a hex count nor an immediate extra action is calculated here.
Another alternative slows enemy Druid: the manual says it moves one space and acts last. The example does not stack two casts in a single hero turn or determine ties among several slowed targets.
Slowed target movement
1
Check in the actual battle
For Haste the manual says Fast, whereas a community reference says Very Fast (4). That disagreement remains visible; no verified numerical reach is claimed. The manual gives Slow one-space movement and last action order. Movement after casting is not automatically part of the spell.
Archer on B2 is adjacent to Goblin on C2. Planned destination B4 is empty and not adjacent to the shown enemy. The gold arrow is a spell-movement plan rather than ordinary walking through the opponent.
After an actual valid cast Archer stands on B4. The hero spent one prepared Teleport copy and its combat action for that round. The changed position does not also represent a shot.
Only when Archer actually acts, has ammunition and remains unblocked can it shoot distant Swordsman. Positions after teleporting are this example’s assumptions; another enemy action can change them.
Check in the actual battle
Teleport moves a troop in combat; Dimension Door moves a hero on the adventure map. Community tables place Teleport at level 3, conflicting with the manual’s printed 1; the catalogue records this. Relocation neither supplies ammunition nor guarantees the enemy cannot restore contact first.
Powerful stacks do not all gain equally from Bless. Compare their own minimum and maximum first, then account for count, Attack, Defense and other circumstances.
The alternative sets Pikeman to its minimum, 3. Suppressing high rolls is not equally valuable against equally numerous stacks with different damage ranges.
One cursed Pikeman
3
Check in the actual battle
The values 6 and 3 are one creature’s damage before further modifiers, not final target HP loss. Peasant’s base 1–1 range gains no extra base damage merely by selecting its maximum. Both alternatives remain subject to one hero action per round.
A ground stack cannot pass through an intact wall. A catapult may need repeated hits on the same section; a firing animation alone does not establish an open path.
Gray C1–C5 cells schematically represent a wall, not the actual complete castle layout. Pikeman on B3 cannot simply move inside. The catapult and ballista lie outside this excerpt.
In this particular branch the first hit did not destroy the section. The manual allows two hits to be needed; this does not mean every section always takes exactly two. Another random shot need not hit the same place.
This later state assumes C3 was destroyed and surviving Pikeman had a valid action to enter the opening. Movement is not automatically simultaneous with the catapult shot. The rest of the wall remains standing.
Check in the actual battle
The manual places the catapult shot before the attacker’s first troop and castle-ballista fire before the defender’s first troop in the round. The catapult hits a random wall section and cannot destroy the ballista. Ballista damage depends on town structures and Mage Guild level; no exact formula is established here. An intact wall provides a defensive advantage against shots.
Game portraits and icons retain their separate artwork rights and sources. Coordinates, annotations, stock panels and tactical explanations are original editorial work. Artwork rights and individual sources.
The reference is the original PC manual, second edition, 1995. Individual spell cards retain disagreements with community inventories, especially Haste and Teleport level. This guide does not infer unverified reach, an exact castle-ballista formula or a complete speed-tie algorithm.