Six specific situations with original creature, hero and spell images. Follow ordinary retaliation, shooter blocking, dragon breath, Wait, Blind and Force Field under Complete / Shadow of Death rules.
This is a local hex-field excerpt with its own coordinates rather than a full map or combat calculation. Arrows calculate neither reach, casualties nor damage. Steps can show conditional preparation or a later phase rather than three immediately consecutive actions.
Draw ordinary retaliation, but check exceptions
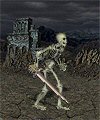
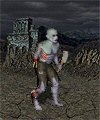
This Skeleton has neither Counterstrike nor another source of extra retaliations. The example stays within one round and assumes both involved stacks still exist after the first exchange.
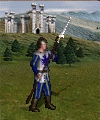
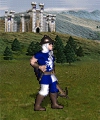
Before the stronger stack attacks, compare the cost of first contact. This is not an automatic recommendation to sacrifice Pikemen: counts, possible losses, reach and whether both allies can actually act matter.
In an ordinary Heroes III exchange the attacker strikes first, followed by an eligible surviving defender. Retaliation uses the current post-hit state. This is not Heroes IV simultaneous exchange.
If the Skeleton actually used its ordinary retaliation and has no more, the next eligible attacker this round does not receive another one. The images predict neither casualties nor damage; a new round or another ability changes the plan.
Decision for the actual battle
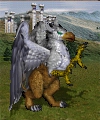
First contact can consume ordinary retaliation. Account for its actual losses and the start of a new round. A Royal Griffin has unlimited ordinary retaliations; one earlier hit does not exhaust them this way.
This Archer is an ordinary shooter without an exception allowing shots beside an enemy. The adjacent Skeleton blocks shooting even at another, more distant target.
The Skeleton occupies a hex adjacent to the Archer. The red line toward Walking Dead marks the intended, currently blocked shot. The shooter does not gain Heroes IV simultaneous ranged retaliation.
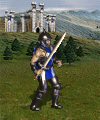
The Swordsman can attack the blocker if its action and reach fit in time. An arrow does not mean the opponent dies. What matters is actually clearing hostile adjacency, including any other enemies around the shooter.
This third state conditionally assumes the blocker has been removed. With no other adjacent opponent and an action and ammunition available, the Archer can consider shooting again. Distance and wall penalties remain separate checks.
Decision for the actual battle
Resolve the adjacent blocker, then reassess shooting. Bow of the Sharpshooter is a specific exception allowing fire next to enemies; a higher Archery rank alone does not supply it.
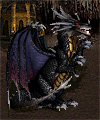
The Black Dragon occupies two hexes and its breath also strikes the hex beyond the main victim. Here a friendly Archer occupies that second affected position.
A friendly Archer stands beyond the Swordsman. Breath can strike it after the main victim. The highlighted pair beneath the dragon shows its occupied footprint, not a safe area against friendly damage.
Move the Archer off the intended line during deployment or on its own action. The faster dragon may need to Wait; it cannot reposition a slower ally for free. Check the shooter’s new sight and safety.
In the same attack direction no friendly stack now stands beyond the Swordsman. That resolves this particular friendly-fire risk without guaranteeing no retaliation, losses or a win. Recheck the rear hex after any change of attack direction.
Decision for the actual battle
Check the second affected hex in the attack direction, including allies. The dragon’s two occupied body hexes and the two hexes hit by breath are different facts. An ally’s repositioning needs a real action or an earlier deployment choice.
Wait changes order rather than normal action count
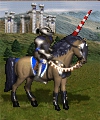
Cavalier has base Speed seven and Walking Dead three. This example uses no further Speed modifiers or extra morale actions. The excerpt does not show their full reach.
The Cavalier chooses Wait instead of acting immediately. Compare that choice with attacking, moving or defending now. Postponement is not a free improvement to every position.
In this example the Walking Dead advances one hex. A different choice requires reassessing the plan. The waiting phase uses the opposite Speed ordering to the round’s opening phase.
3. Separate this round’s end from the next opening
The Cavalier uses its postponed action. With its higher Speed unchanged it can precede the Walking Dead again in the next normal phase. Two closely timed actions would belong to different rounds, not two free turns from Wait.
Decision for the actual battle
The normal phase orders faster stacks before slower ones; the waiting phase reverses Speed ordering. More stacks, equal Speed and extra actions need their additional rules. Wait itself does not grant two attacks in one round.
Retaliation when waking from Blind depends on Fire Magic
This example assumes Blind is learned and the living Pikeman is eligible without the relevant immunity. Solmyr is only the illustrative commander; neither this spell nor Expert Fire Magic is assigned to his starting profile.
Illustrative commander outside the field
Solmyr
1. Do not damage the controlled target without a plan
Damage wakes the blinded stack. First verify actual Fire Magic mastery, target eligibility and other combat rules. An unintended area-damage wakeup can undo the planned control.
The Swordsman reaches eligible melee contact. A Blind label alone does not mean zero response: distinguish ordinary, Advanced and Expert spell variants before committing.
The table concerns retaliation against this waking attack rather than all later hits on the now-active target. It is not a damage calculation without actual counts and attributes.
Untrained / Basic
50%
Advanced Fire Magic
25%
Expert Fire Magic
0%
Decision for the actual battle
Do not confuse control ending with no retaliation in every case. Against the waking attack ordinary retaliation is fifty percent, Advanced twenty-five percent and Expert none. Assess following attacks and the target’s new state again.
The commander has Force Field available and Advanced Earth Magic in this example. The three displayed hexes follow the attacker-side barrier shape without replacing the actual battle’s valid-cast preview.
A direct route from the Skeleton leads toward the shooter. Choose a legal barrier location from the complete field and other obstacles. This excerpt does not declare every path outside the image blocked.
The green hexes form the advanced barrier: origin, its upper-right neighbour, then that hex’s upper-left neighbour. A ground opponent must respect the occupied cells. Still check another route, flight and a valid landing position.
The third state represents the time after the barrier disappears rather than necessarily the immediately following action in the same round. The original approach is clear again. Use the gained time for an actual attack, move or other available preparation.
Decision for the actual battle
The barrier occupies two hexes untrained or at Basic and three from Advanced; it lasts two rounds without extension from higher Spell Power alone. Blocked cells do not mean the whole battlefield is sealed. Consider detours, flyers and expiry.